How to Use Requester.pro
Everything you need to know to get your team running.
Getting Started
Sign in with your Google or Microsoft account to create your Requester.pro workspace.
Once signed in, you'll be guided through a quick onboarding:
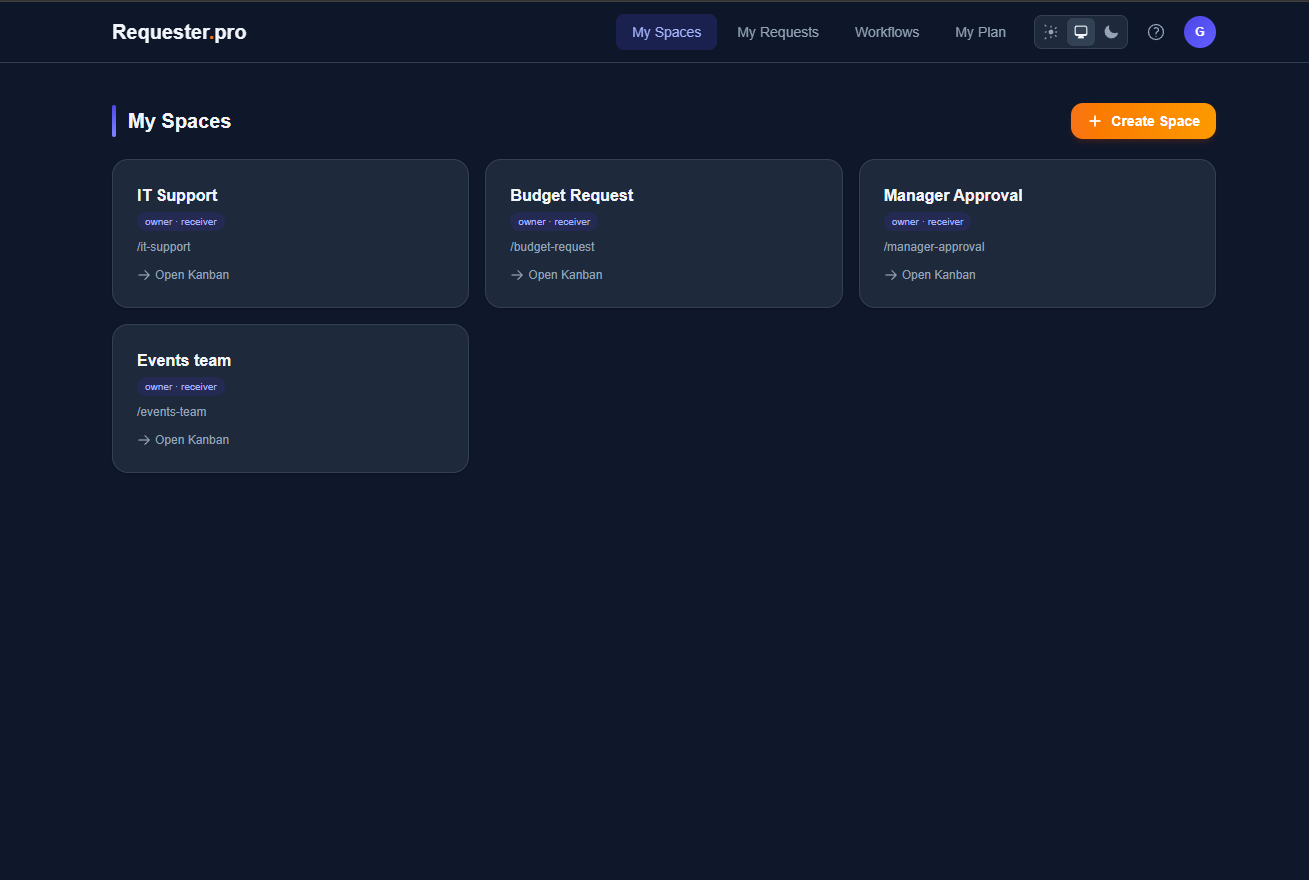
1. Name your first space (e.g., "IT Support", "Procurement")
2. Create a request template with custom fields
3. Invite your team members
You can skip any step and come back to it later from your dashboard.
All paid plans include a 7-day free trial — no charge until you decide to stay.
Creating Templates
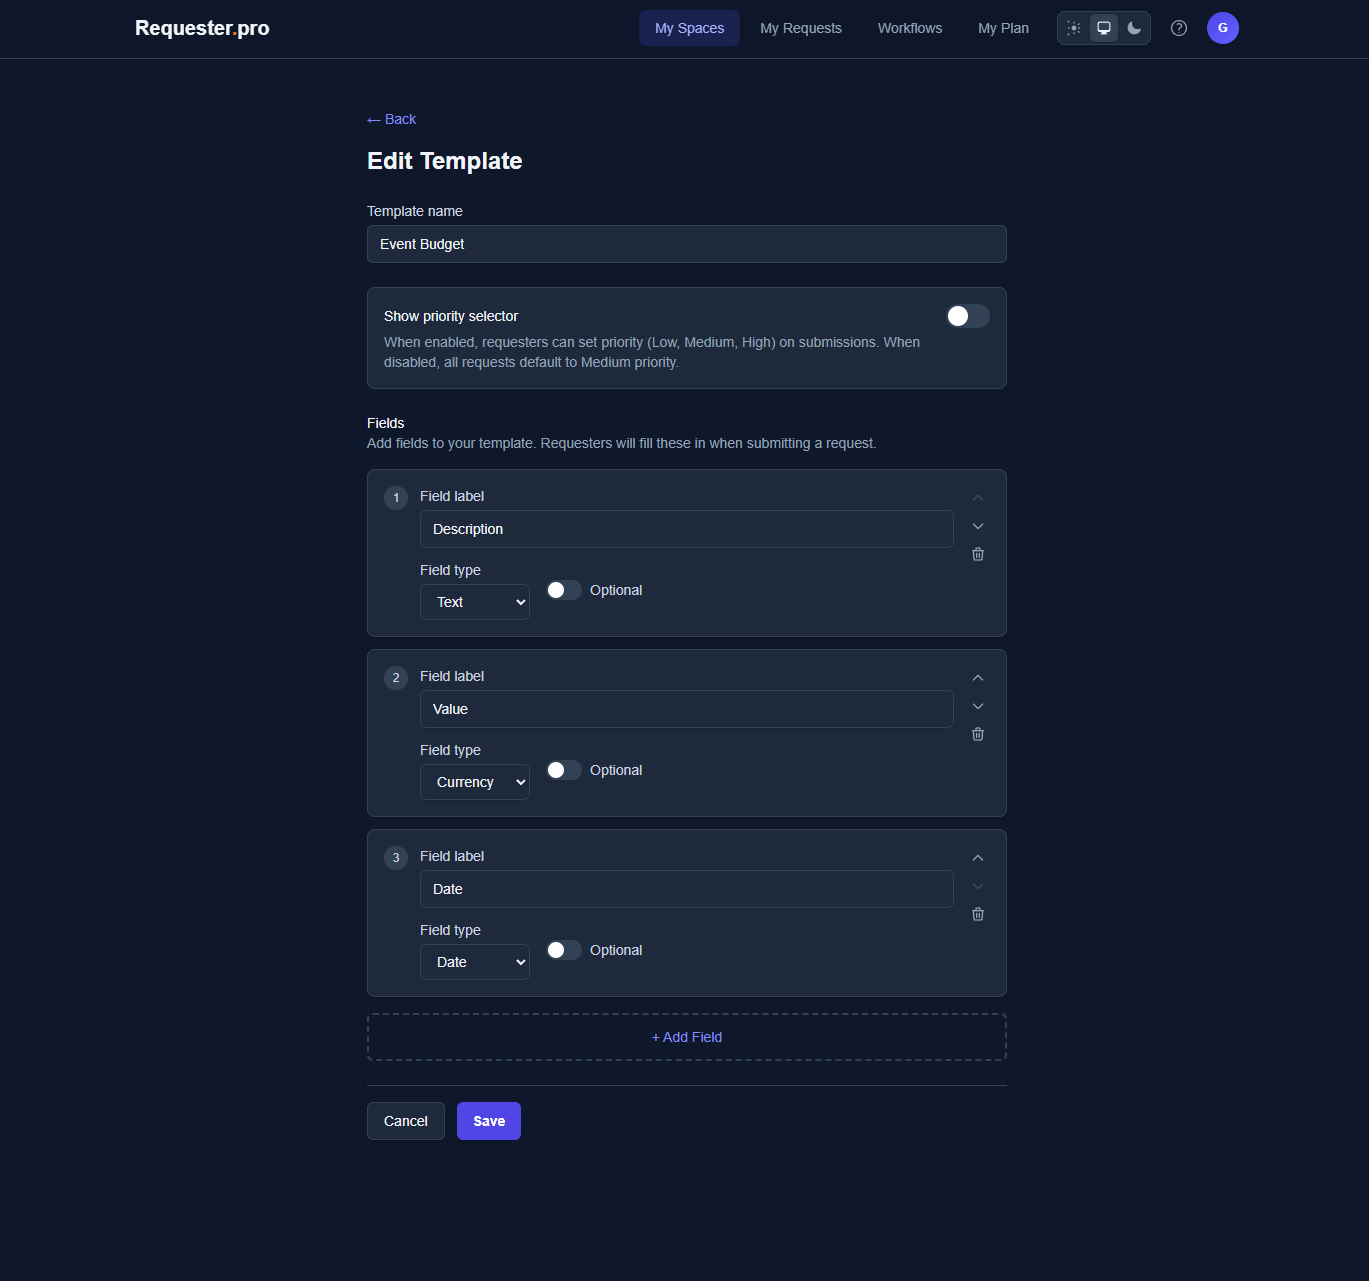
Templates define the structure of requests in each space. Think of them as forms your team fills out.
To create a template:
1. Go to your space → Templates tab
2. Click "New Template"
3. Add fields (Text, Dropdown, Date, Currency, Yes/No, Link)
4. Mark fields as required or optional
5. Toggle the priority selector if needed
Examples:
• IT Support: Description (text), Category (dropdown: Hardware/Software/Access), Urgency (dropdown)
• Expense Reimbursement: Amount (currency), Date (date), Category (dropdown), Receipt attached (yes/no)
• Project Intake: Brief (text), Budget (currency), Reference URL (link)
Inviting Your Team
Each space has three roles:
• Requester — Can submit requests and track their status
• Receiver — Handles incoming requests on the Kanban board
• Admin — Can manage templates, members, integrations, and settings
The space Owner has full control including deletion.
To invite members:
1. Go to your space → Members tab
2. Enter email addresses (up to 50 per batch)
3. Choose a role
4. They'll see a notification banner to accept the invitation
Admins automatically get the Receiver role too (eligible for assignment). They can opt out by removing the Receiver role from themselves.
You can edit roles at any time from the Members page — click "Edit" next to any member to add/remove roles.
Public spaces allow any logged-in user to submit requests without an invitation.
Submitting Requests
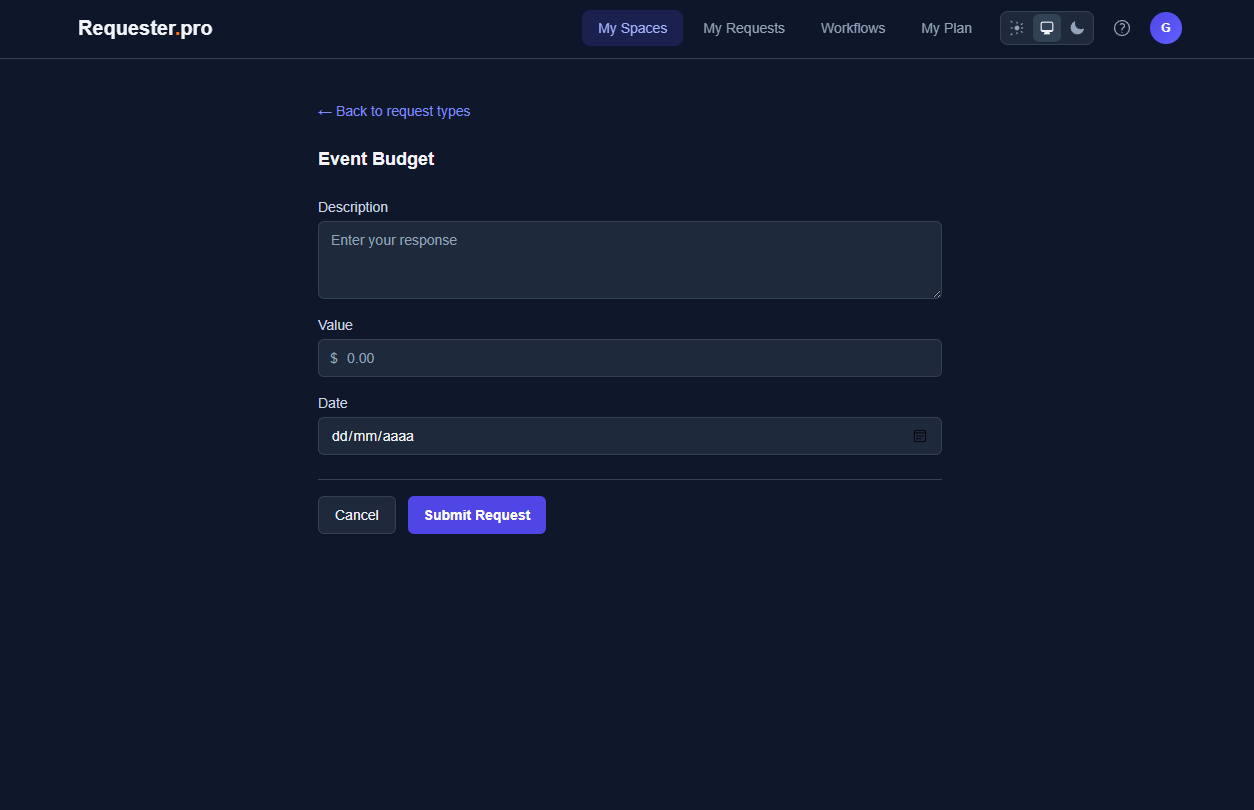
To submit a request:
1. Visit a space (via link or from your dashboard)
2. Choose a request template
3. Fill in the fields
4. Submit
You'll get a confirmation with your request ID. Track all your requests from the "My Requests" tab in the navigation.
You can cancel pending requests or confirm/reopen completed ones (if the space has requester confirmation enabled).
Managing Requests (Kanban)
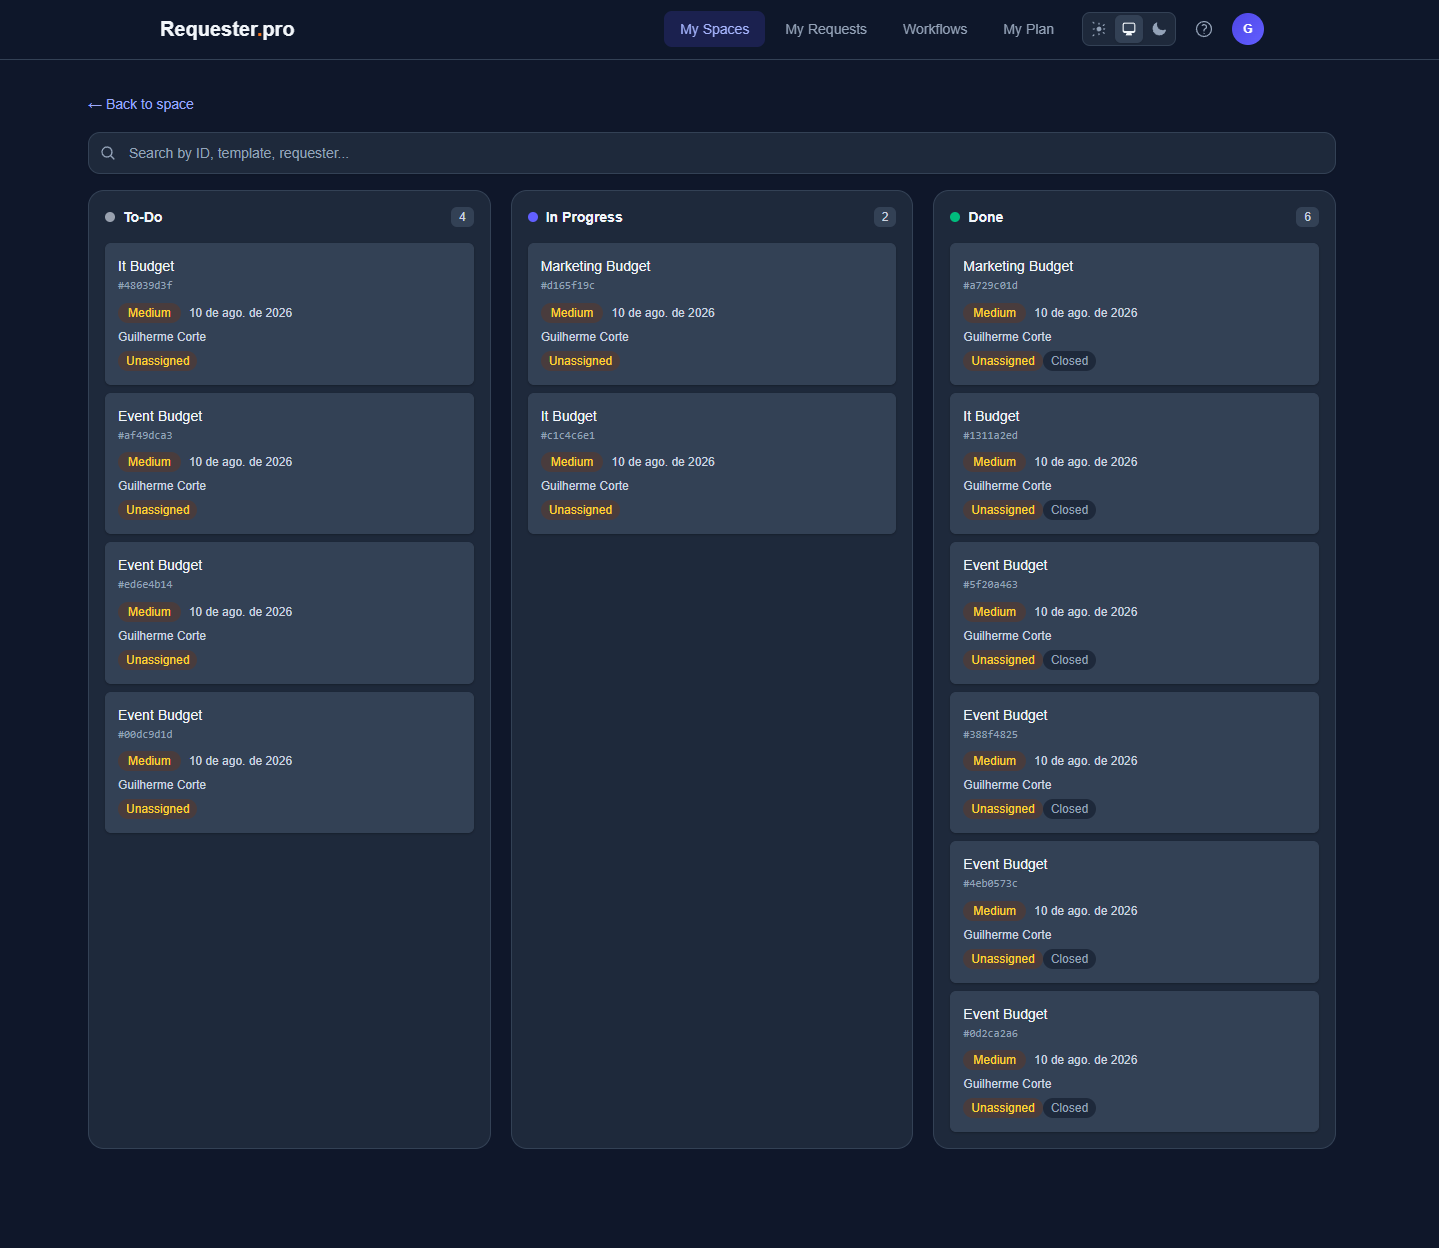
Receivers see incoming requests on a Kanban board with three columns:
• To-Do — New requests awaiting action
• In Progress — Requests being worked on
• Done — Completed requests
Drag cards between columns to update status. Requests are automatically assigned to the receiver with the lightest workload (fair distribution).
Search & Filter:
Use the search bar at the top of the Kanban board to quickly find requests by ID, template name, or requester. Useful when you have many open requests.
Comments:
Click any request card to open the detail panel. At the bottom you'll find a comment section where you can discuss with the requester. Comments trigger email notifications to the other party.
Admins and owners can reassign requests. If enabled, receivers can also reassign to each other.
When moving to Done, you may be prompted to add a closing note explaining what was done.
Workflows & Connectors
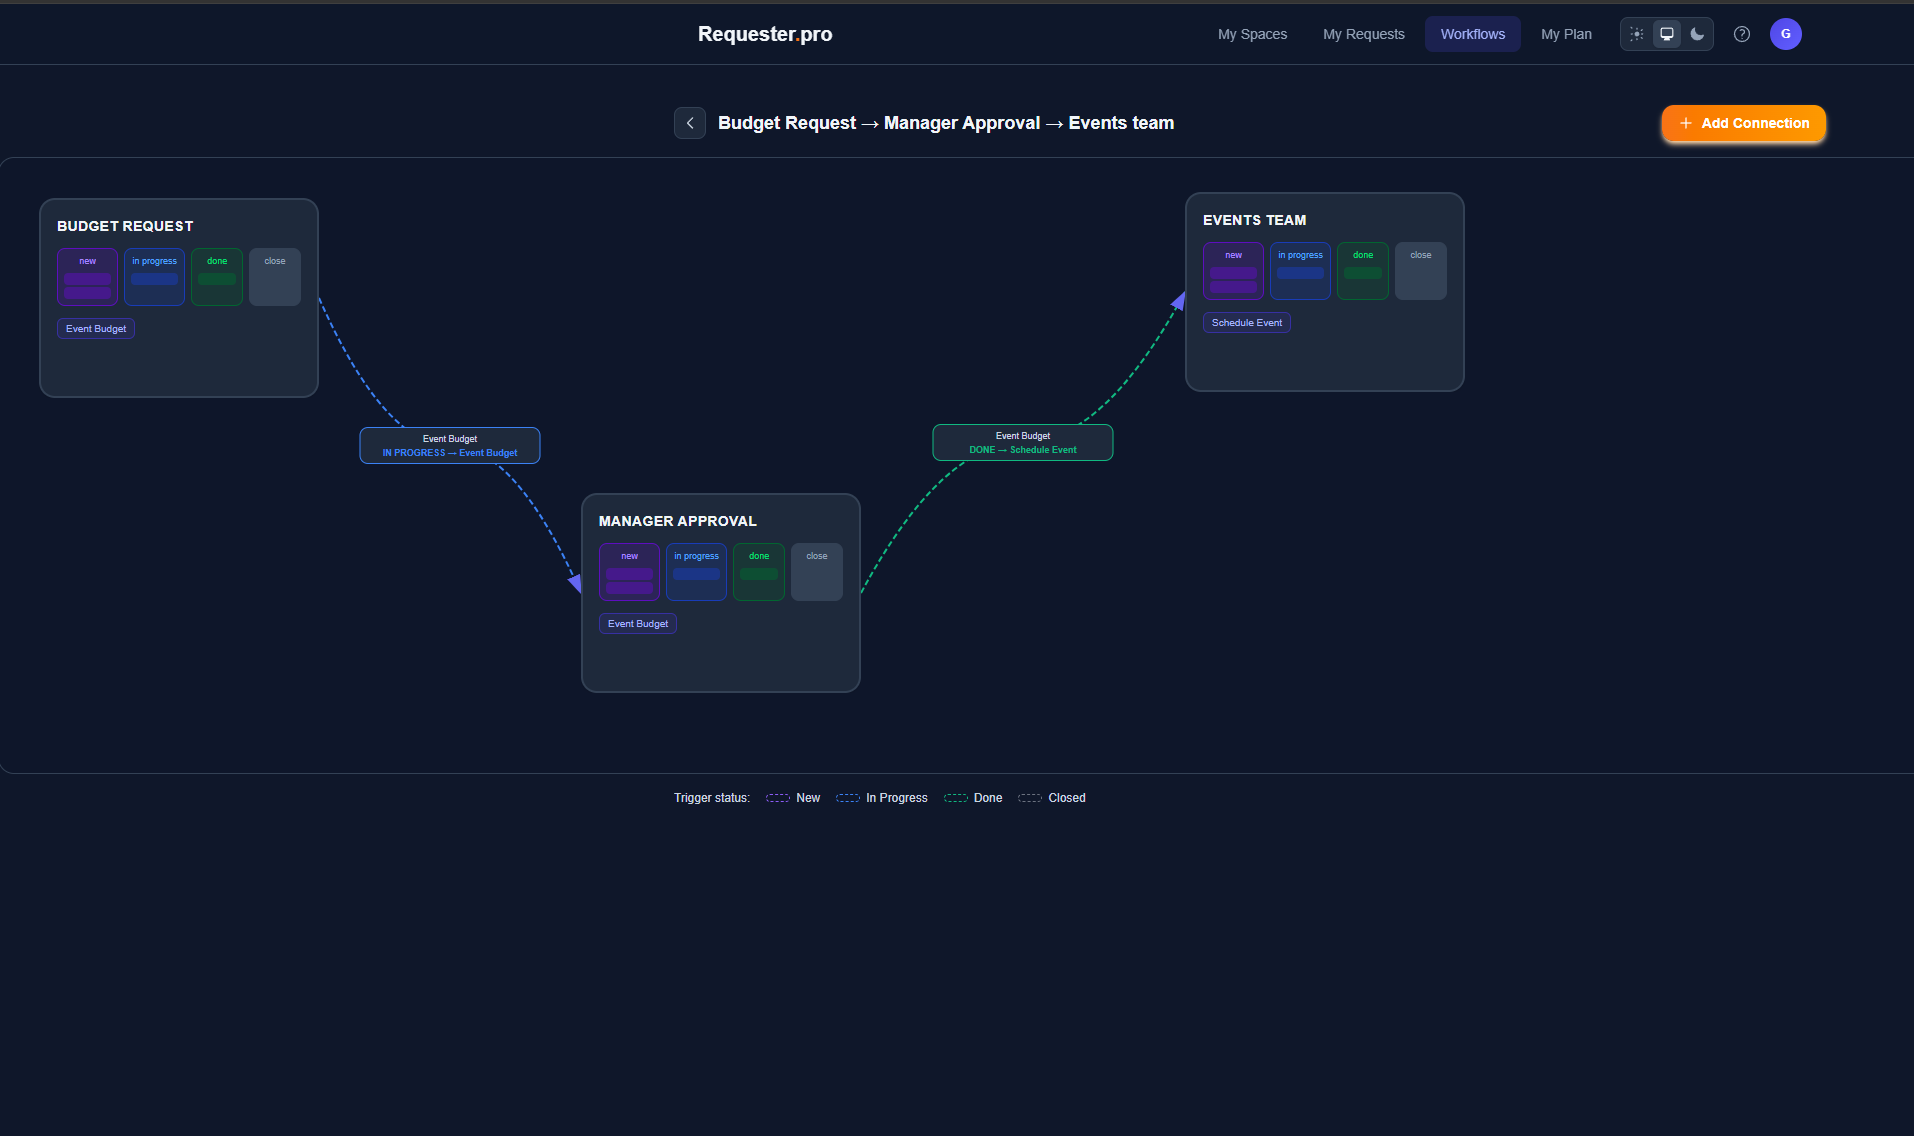
Connectors link two spaces together. When a request in one space reaches a certain status, a new request is automatically created in another space.
Example: When an "IT Support" request is marked Done, automatically create a "Procurement" request for the approved hardware.
To set up a connector (Pro/Business plans):
1. Go to your space → Integrations tab
2. Click "Create Connector"
3. Choose the source template and trigger status
4. Select the target space and template
5. Map fields between the two templates
Connectors support direct mapping (copy field value), static values, and dynamic values (requester name, close date, etc.).
View all your connected spaces in the Workflows page.
Billing & Plans
Requester.pro offers 5 tiers:
• Free — 2 spaces, 40 requests/month
• Starter — 3 spaces, 100 requests/month
• Growth — 6 spaces, 200 requests/month
• Pro — 10 spaces, 500 requests/month + Workflows
• Business — 20 spaces, 1000 requests/month + Workflows
Upgrade anytime from Settings → My Plan. Downgrades are handled through the Manage Subscription portal (Stripe).
Payments are processed securely via Stripe. You can update your payment method or cancel at any time.
File Attachments
Attach files to your requests for richer context.
Supported files:
• Images: JPG, PNG, GIF, WebP
• Documents: PDF, DOC, DOCX, XLS, XLSX, PPT, PPTX
Constraints:
• Maximum 10 MB per file
• Maximum 5 files per request
To attach files:
1. When submitting a request with a file field, click "Add file" to select files
2. Files are uploaded automatically when you submit the request
3. You can also attach files after submission from the request detail panel
Team members with space access can download attachments by clicking the file name in the request detail view.
Favorites & Sharing
Keep your most-used spaces at your fingertips and share them with others.
Favorites:
• Click the star icon on any space card to add it to your Favorites section
• Favorite spaces appear at the top of your dashboard for quick access
• Click the star again to remove a space from favorites
Share Links:
• Click "Share link" on any space to copy its direct URL to your clipboard
• Share the link with team members so they can navigate directly to the space
• For public spaces, anyone with the link can submit requests after signing in
Export & Import Configuration
Back up your space configuration or replicate it across workspaces.
Exporting:
1. Go to your space → Settings
2. In the Danger Zone section, click "Download Config"
3. A JSON file with all templates and settings is downloaded
4. This is also recommended before deleting a space
Importing:
1. When creating a new space, choose "Import File" mode
2. Select a previously exported JSON config file
3. The space will be created with all the templates from the config
You can also use preset templates when creating a space — choose "From Preset" to pick from pre-configured template sets.
The config file includes: template names, field definitions (types, labels, required/optional, options), and space settings.